


How to Cyanotype Negatives
Cyanotype is a super fun, super easy, and super satisfying photography alternative process. It is this incredible process of creating images with the sun or UV light! Oftentimes, you can find paper at art supply stores pre-coated with sun-sensitive dye, but today I will be explaining how to undergo this process with powder and plain paper.
What You Will Need:

- A negative, or an image you want to print (Remember: it will be in tones of blue, so don’t choose anything based on the colors)
- Transparency sheets
- A cyanotype chemistry set (I use Jacquard here, but any set will do)
- A thicker, smooth-grain paper
- Gloves
- Bristle brush or sponge
- Old clothes
- An old picture frame the size of your paper
- Paper bags or newspaper
- Measuring spoon or dropper
Let’s Begin!
Choose Your Image
Any image can be cyanotyped, however, it MUST be inverted/a negative before printing. Inverting the image is super easy- there are lots of tools if you search online, or you can do it in Adobe Lightroom. Typically, you are going to want to print an image that has a bit of contrast- it will turn out better and be more dramatic once developed. You can always edit your image to have more contrast if needed. If you are using a physical negative, use a printer scanner bed in order to enlarge your image. I used a 120 film negative and after scanning it, transferred it to my phone. The image will then need to be printed onto a transparency, which is essentially a clear plastic sheet that will act as a giant negative. The brand Pictorico is the most popular option. Cyanotype purists would argue that this is kind of cheating and that you must create a transfer in a darkroom, but the majority of us don’t have access to those tools, so this is how we are going to do it. Load your sheets one at a time into your printer according to its loading instructions and print your image. I am not sure how to do it with other printers, but if you have an HP printer, using the HP Smart app is very helpful in sizing and printing your negatives. Additionally, make sure that your printer is in the correct settings for transparency sheets.

Chemical Preparation
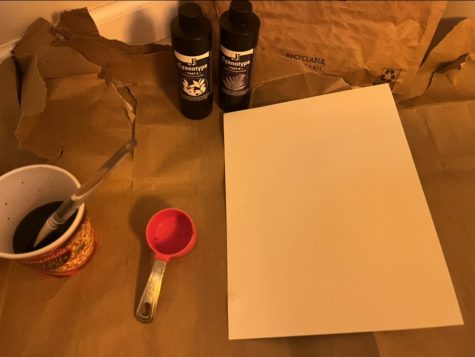
The first thing you are going to have to do is prepare your chemicals in advance. The kit should include two bottles labeled Part A and B, respectively. Part A is powdered Potassium Ferricyanide and B is Ferric Ammonium Citrate (Ok, this might be starting to sound sort of dangerous, but I promise, they are safe to use and much safer than some other photography chemicals). If you plan to continue cyanotype in the future, I recommend buying the larger bottles offered that allow you to mix any amount you please, but a set works great (and lasts a while) just to experiment. Before starting, make sure you are wearing clothes you don’t mind getting stained, and wear gloves. You can also wear goggles and/or a mask if you are dealing with powder; however, just make sure you are in a well-ventilated area. Fill each bottle to the top with tap water and SHAKE!! You want to make sure that all the powder gets dissolved. Once that is ready, relax and wait 24 hours. These solutions have a shelf life of around 2 months, however, so don’t worry about using all of it.
Painting Your Paper
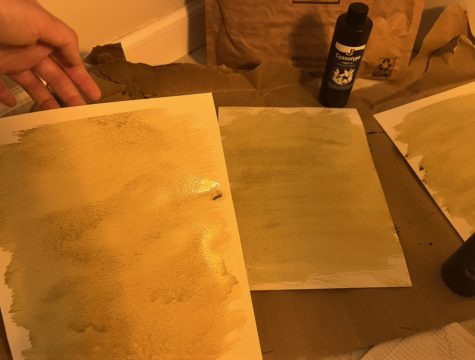
Once 24 hours have elapsed, you are ready to coat your paper. You need to do this in a dimly lit space, away from ALL natural and UV light. Standard light bulbs are okay, but any form of UV light will expose the paper and ruin the process. I recommend using a bathroom like I did, or maybe a laundry room, closet, etc. Again, before starting anything, get your gloves and stained clothes on because things could get messy. The dye could also stain surfaces, so I made sure to lay down a paper bag/newspaper on my working area (unfortunately, my bathtub is now slightly blue). You will need both solutions, a measuring spoon or dropper, a small mixing container, a brush, and paper. Once you are in the light-safe area, mix equal parts of Part A and Part B together in your mixing bowl. ONLY MIX WHAT YOU NEED. After the solutions are mixed together, they are only stable for a couple of hours and if you mix too much, you will not be able to use all of it and it will be wasted. When painting paper, you don’t need a lot so it’s best to use a dropper, working in small amounts, because it’s better to have to mix more than waste your dye. Let that sit for a couple of minutes and lay down your paper. If you want the background to be a little rougher, use a bristle brush. If you want a smooth background, I recommend using one of those black sponges on the wooden sticks. Paint on the magical dye to the size you’d like. Don’t use too much otherwise when you hang it to dry, it will drip and dry with marks. Find a place where you can leave the paper to dry in a cool, dark place. I decided to use my bathroom shower because that’s where I was doing this project and I created a little clothesline to hang up the paper. The paper should only take around 20 minutes to dry. Once dry, the paper is ready to use. If you’d like, you can even paint on another layer, but this is optional. Up until you are ready to use, keep the paper in a sealed, light-proof bag.

Time to Expose!
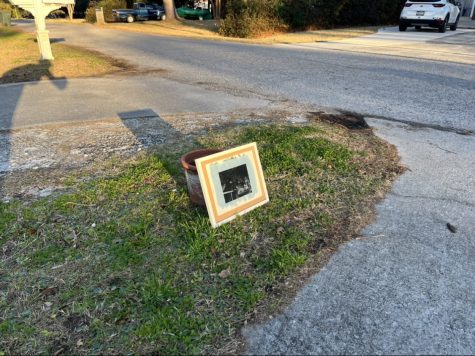
An old picture frame is the best tool to have in this process- you will need the glass and the backing that comes with it. Basically, you are going to layer the painted paper, negative, and frame backing. Open up your frame and leave the glass panel in the front. Then insert your negative sheet with the inked side facing out towards you (where it will be touching the paper, not the glass), next insert the paper so that the paint is touching the negative. Keep it all together by inserting the cardboard backing in its place. Congrats, your image is ready to be exposed! However, make sure you are choosing a good time of day/weather to actually develop the image. Full sun is ideal and it will be easiest during midday when the sun is directly above; If you are exposing during a different time of day, just make sure that the frame is directly facing the sun by angling it on something. Otherwise, lay it down flat. Depending on how sunny it is, your exposure times will differ. During full sun at 1 pm, I exposed for 25 minutes. However, sometimes it can take up to an hour. Keep an eye on your frame and monitor the color change of the cyanotype. Once it reaches a dark bluish color, it should be finished. Honestly, this is a trial and error process and it takes practice to get the timing right. Remove the picture from the frame and reveal your masterpiece, which might not look all that great right now, but wait until you rinse it.
Rinse, Rinse, Rinse
Probably the easiest step in this process: rinse! All you are going to need to do is remove your image from the tray and rinse it in a tray or sink for 5-15 minutes until the water runs clear. You can also do a quick 60-second rinse before with a diluted solution of vinegar or hydrogen peroxide (acids) with water which will result in a stronger blue color. Hang to dry.
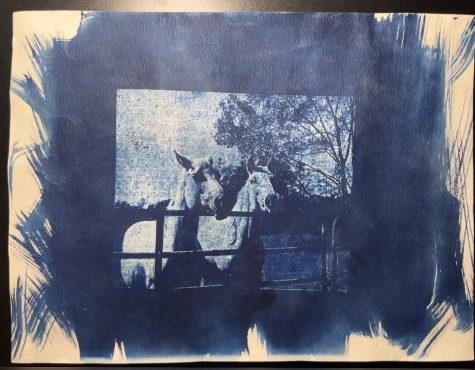
As the print dries, it will further develop and you will start to see what it really looks like. Even though cyanotyping is a long process, it is a lot of fun and there is so much experimentation you can do. You can even change the colors of your image using tea toning! I talked about negatives in this article, but you can also use treasures from nature, like leaves, flowers, or shells that will leave impressions on the ink. I hope this guide was helpful and inspired someone to go out there and print!


Micheline Callicott • Jan 27, 2023 at 12:37 pm
Beautiful work!