
A Beginner’s Guide to Film Photography
Insight into the overwhelming world of film.
Film photography can seem super daunting at first- various films, formats, ISOs, lenses, etc etc- and sometimes it feels like you can never make the right choice with photographers online sharing totally different opinions. However, I speak from personal experience and I feel like I have more or less gotten through a little bit of all the information and I have some advice: from a total amateur to a total beginner. But, the great thing about photography is that there really is no right or wrong answer, so consider this more of a guide rather than a hard set of rules you need to follow.
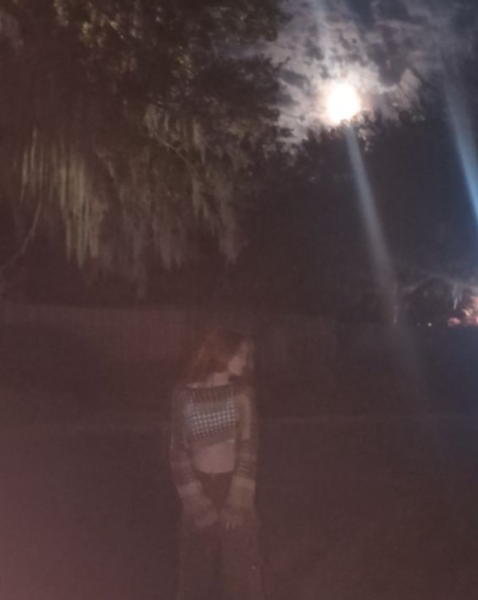
Before we go any further, I just want to emphasize why you should try out film. The process of film photography is so much fun-from shooting, to developing, and finally printing. It’s always so exciting to get your developed film. And honestly, the warmth of film is so nostalgic and digital can’t compare.
Format
First, let’s talk about format: The most popular formats are 35 mm and 120 (medium format). This is not a complete list AT ALL, but the most relevant in my opinion. For a beginner, I would recommend exploring 35 mm because it is the most accessible in terms of film and equipment, as well as information. I like medium format, but I started with 35 mm.
Medium: The biggest question is deciding whether to shoot in color or black and white. When I first started getting into photography, I was drawn to the bright colors of photographs and convinced myself, in my usual impatient self, that I didn’t need to start with the basics and could just throw myself into a craft I knew nothing about. However, I realize now that black & white is the best way to learn about photography. By starting in black and white, you will learn so much about how light works, which is the core of photography. We, especially myself, can be distracted by colors and in turn don’t really understand the role light plays in a photograph. By removing color, you now can focus more on texture, lines, light, and purpose of your image. However, not every picture is a “good” black and white picture- same goes for color. Personally, I LOVE color film, especially when I’m outdoors where color can play a big role in the image. However, I’m taking a step back and going back to the basics in order to help me understand light better. Not to mention, if you are interested in developing your film too (I highly recommend taking photography here at AMHS if this sounds like you, because it’s hard to get access to a darkroom and involved to make your own), black and white is going to be the most accessible way to do so. B&W film is also so much cheaper. The third type of film I’ll talk about is color reversal/slide/color positive film and what’s cool about it is that instead of giving you a negative when you develop it, it’s already a positive image. The concept is super cool and I bought a ton of it when I took my camera on a hiking trip because it supposedly makes great landscapes. That was before I knew that it is notoriously tricky to expose and, I definitely learned that the hard way….. It was very underexposed and I was very sad.
Which camera?
Let’s talk about cameras: You do not, I repeat DO NOT, need an expensive camera to take good pictures!! If you understand light and composition, you could make a masterpiece with your phone camera. Do not be fooled by the fancy equipment professional photographers have: you don’t need that. And I’ll tell you why because I was fooled. So, when I first was interested in photography, I wanted a point and shoot to just carry around with me to capture everyday moments and practice composition and such. Well, this was around the time that the Yashica T4 was super popular and at the top of every “best point and shoot cameras YOU need” list among others. I spent way too much money on it and, after spending a ton more money to get the film developed, lo and behold: the pictures were astoundingly average. I got an expensive camera thinking it would turn me into a professional overnight and I was so wrong. Right now, apparently the Contax T2 is super trendy, with actors and models sporting them on the red carpet, but they are selling on ebay for over 1,000! I’m sorry, but that is ridiculous for a point and shoot. Not to say these cameras aren’t good, but you can get similar results for a way, way smaller price tag. The best choice is to get a cheap point and shoot you can have on you at all times, like the Olympus Trip 35. I’ve never used it, but I’ve seen a lot of people say they like it. It’s compact and you can find one on ebay for under a 100 bucks. Also, it’s better than buying a disposable one constantly! What I noticed most though while I had the point and shoot is that I wasn’t really learning- I wasn’t changing the shutter speed or aperture, or even considering the ISO of the film I put in the camera. If you want to learn the mechanics of photography, definitely find a manual camera where you can practice all the different settings and learn how the components all work together.
Other Equipment: Equipment can also be a pretty intimidating because there just seems to be so much stuff, but you don’t need everything, so I’ve broken it down into dos, maybes, and don’ts
DO
- Camera strap: you do not want to drop it facedown on the lens…
- Camera bag: especially if you have a bigger camera, if you are traveling with it or carrying it around it gets annoying really fast to not have a bag. You don’t need a fancy bag or anything and it doesn’t even need to be a a camera specific bag. Check ebay and thrift stores before opting for a new one.
MAYBE:
- light meter: Light meters are super helpful to help you determine what shutter speed and aperture you should set your camera to in relation to the ISO (speed) of the film. I didn’t have a light meter for a long time, but, it helped me so much in getting a better understanding of shutter speed and f/stop, which in turn helped my photos be properly exposed. But they can be pricey- don’t consider it a priority if you are just starting out, especially if you want to do street photography; it’s mostly used in studio and landscape settings.
- Tripod: If you want to do landscape or studio photography, you might want to find a tripod and you’ll definitely need one if you want to do long exposures. But otherwise, not totally necessary, just depends on your interests.
DON’T:
- A ton of different lenses: If you watch a professional photographer sharing a “what’s inside my camera bag” video, then you’ve seen them pull out a ton of lenses, which really scared me at first. I couldn’t afford to get any extra lenses, only the one that came with my camera, so my head was spinning while I was thinking-which lens do I choose?? Going online confused me even more, especially because I was looking for a medium format camera and lens options are all over the place. If you want a medium camera with a lens you can use for all occasions, I would find one with a 90 mm lens maybe. Small lenses won’t be great for wide landscapes. Larger lenses could distort faces if you plan to do portraits. Those are the basics.
- Filters- while fun (in both black and white and color!), you don’t need them right when you start out. If you are trying out different films and experimenting with exposure, a filter will get in the way of accurately knowing what’s going on with your film. Color filters can be really cool in black and white photography, and a polarizing filter will help with reflections and make oceans and skies in landscapes super saturated.
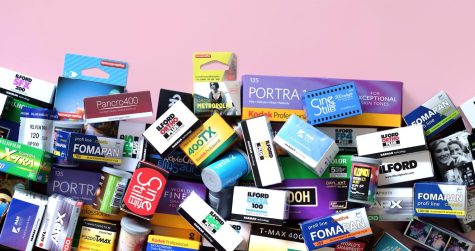
And possibly the most exciting but also daunting part: FILM.
There are different brands and formulations and speeds and it’s a lot to take in at once. ISO is relatively simple: the lower ISO/speed (100,160, etc.) is, the less sensitive to light it is. The higher the ISO (400, 800, 1000) the more sensitive it is. If you are shooting outside on a very sunny day, go for a ISO 100 film, and if you are outside during dusk, an 800 would give great results. The lower the ISO, the less “noise” or graininess you’ll have too, which gives for super super smooth images. Most people like to have a ISO 400 on them for all occasions, as it is a nice mid speed and can be exposed more or less depending on the settings. So, now let’s talk about brands and formulations. Kodak and Ilford are the biggest players in the game, with Fujifilm having a couple strong contenders. While Kodak does have a black & white stock, they are most well known for their color films and Ilford is the place to go for black and white. I’m just going to list out some of the stocks I’ve used and my experiences with them, as well as other major films.
- Kodak Portra 400: Spend one day researching film and you will come across a million millennial men raving about this film stock. Like, I’m serious, they are obsessed. So naturally, I was wondering does it live up to the hype? And alas, this film stock is amazing. It captures colors beautifully and is great for any situation- landscapes, portraits, studio, etc. To get that classic “portra” look, lots of people actually like to overexpose it by pulling it back 1.5 stops, which basically means setting the ISO on your light meter to ISO 150, tricking the camera into thinking it is a less sensitive film.
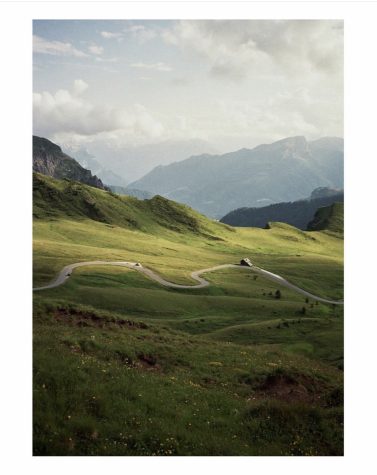
@bren.eccles Portra 400 renders green beautifully. - Kodak Colorplus- Kodak has 2 lines- the regular film (Colorplus, gold) and the “professional line” (Portra, Ektar, Ektachrome). The regular line is more targeted to everyday use rather than a professional. However, many say that Colorplus is a much cheaper dupe for Portra! I have yet to try this because I believe it only comes in 35 mm.
- Kodak Ektar 100- This film is AMAZING for landscapes. Like if you want a dramatic landscape, load your camera with Ektar. It’s warm and its low ISO gives for a super fine grain and smooth images.
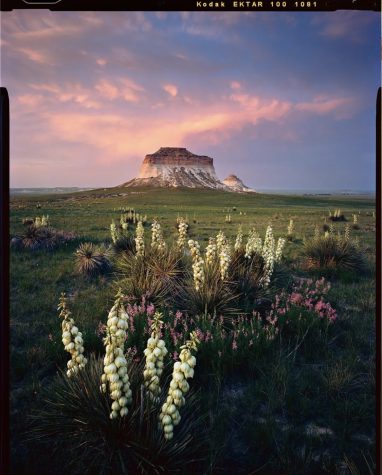
@alexburkephoto Ektar’s landscapes are unbeatable. - Kodak Ektachrome- This is the color-reversal film I mentioned earlier. While having the capacity to create beautiful landscapes, I was just not knowledgeable enough to know how to expose it properly. I had like 10 rolls and only got like a couple shots I was somewhat happy with and I cannot continue to afford that ratio! So yes, use at your own risk…
- Kodak Gold- Kodak gold is awesome. If you’re after that classic vintage-y feel and want to load up a film in your point and shoot, go for gold. It’s super warm and just feels so nostalgic.
- Ilford FP4- This is such an incredible B&W film!!!! After experimenting with all the films mentioned above, I got some of the best shots in black and white using this film. It’s super smooth and straightforward to expose.
@serenamen.te Ilford FP4 achieves super smooth images - Ilford HP5: I really want to try this one too- also iconic and affordable.
- Any Cinestill film: This film seems really popular among photographers who like shooting neon lights and signs at night to make them really glow. The results are super cool, however this film is limited in its uses.
This has gotten incredibly long. This is clearly an extensive guide, and I didn’t even get to cover composition, developing, or printing. Maybe I’ll make a part 2. But in conclusion, try out film and just have fun.